Hetzner Routed Network (Subnets Only)
Hetzner is an extremely popular choice for hypervisors due to cost, speed and availability of IPs. However, Hetzner runs a strict network and their IPv4 subnets generally won't work with a standard network bridge.
In our example we will use a /29 subnet. You can find the IP pricing here.

Hetzner state that there are 6 usable IPs with a /29, however, when routing the subnet you can usually use both the network addresses. This means you will have the use of all 8 IPs.
In the Hetzner Robot control panel, it will list all your IPs. For example, our /29 subnet.

All the addresses can be used for virtual servers.
Hypervisor Network Configuration
In /root on the hypervisor create a file called network.xml.
nano -w network.xml
In that file you should configure your network.
<network>
    <name>BRIDGE_NAME</name>
    <forward mode='route' dev="PRIMARY_INTERFACE"/>
    <bridge name='BRIDGE_NAME' stp='on' delay='0'/>
    <ip address='IP_RANGE' netmask='IP_NETMASK'/>
</network>
BRIDGE_NAMEshould be the name of your network.br0is a good example.PRIMARY_INTERFACEshould be the name of your primary interface. You can find it with theip acommand.IP_RANGEshould be your Hetzner subnet. Try to usexxx.xxx.xxx.1if possible. It doesnt matter if you don't own that IP. It will be used as the gateway.IP_NETMASKin most cases should be255.255.255.0and you should ignore the netmask Hetzner give you.
For example using our subnet, the configuration would be the following.
<network>
    <name>br0</name>
    <forward mode='route' dev="eth0"/>
    <bridge name='br0' stp='on' delay='0'/>
    <ip address='95.217.97.1' netmask='255.255.255.0'/>
</network>
You should now save the file (ctrl+x).
You can now define the network, set it to autostart and start it.
virsh net-define --file network.xml
virsh net-autostart br0
virsh net-start br0
br0 should be the name of the network you used in the configuration.
VirtFusion Network Configuration
Now that you have your routed network setup on the hypervisor, you can configure it inside the control panel.
Modify your hypervisor network and make sure its set to Libvirt Routed and you specify the correct network name.

Create a new IPv4 Block and fill in the details. The following is based on our example /29 block.
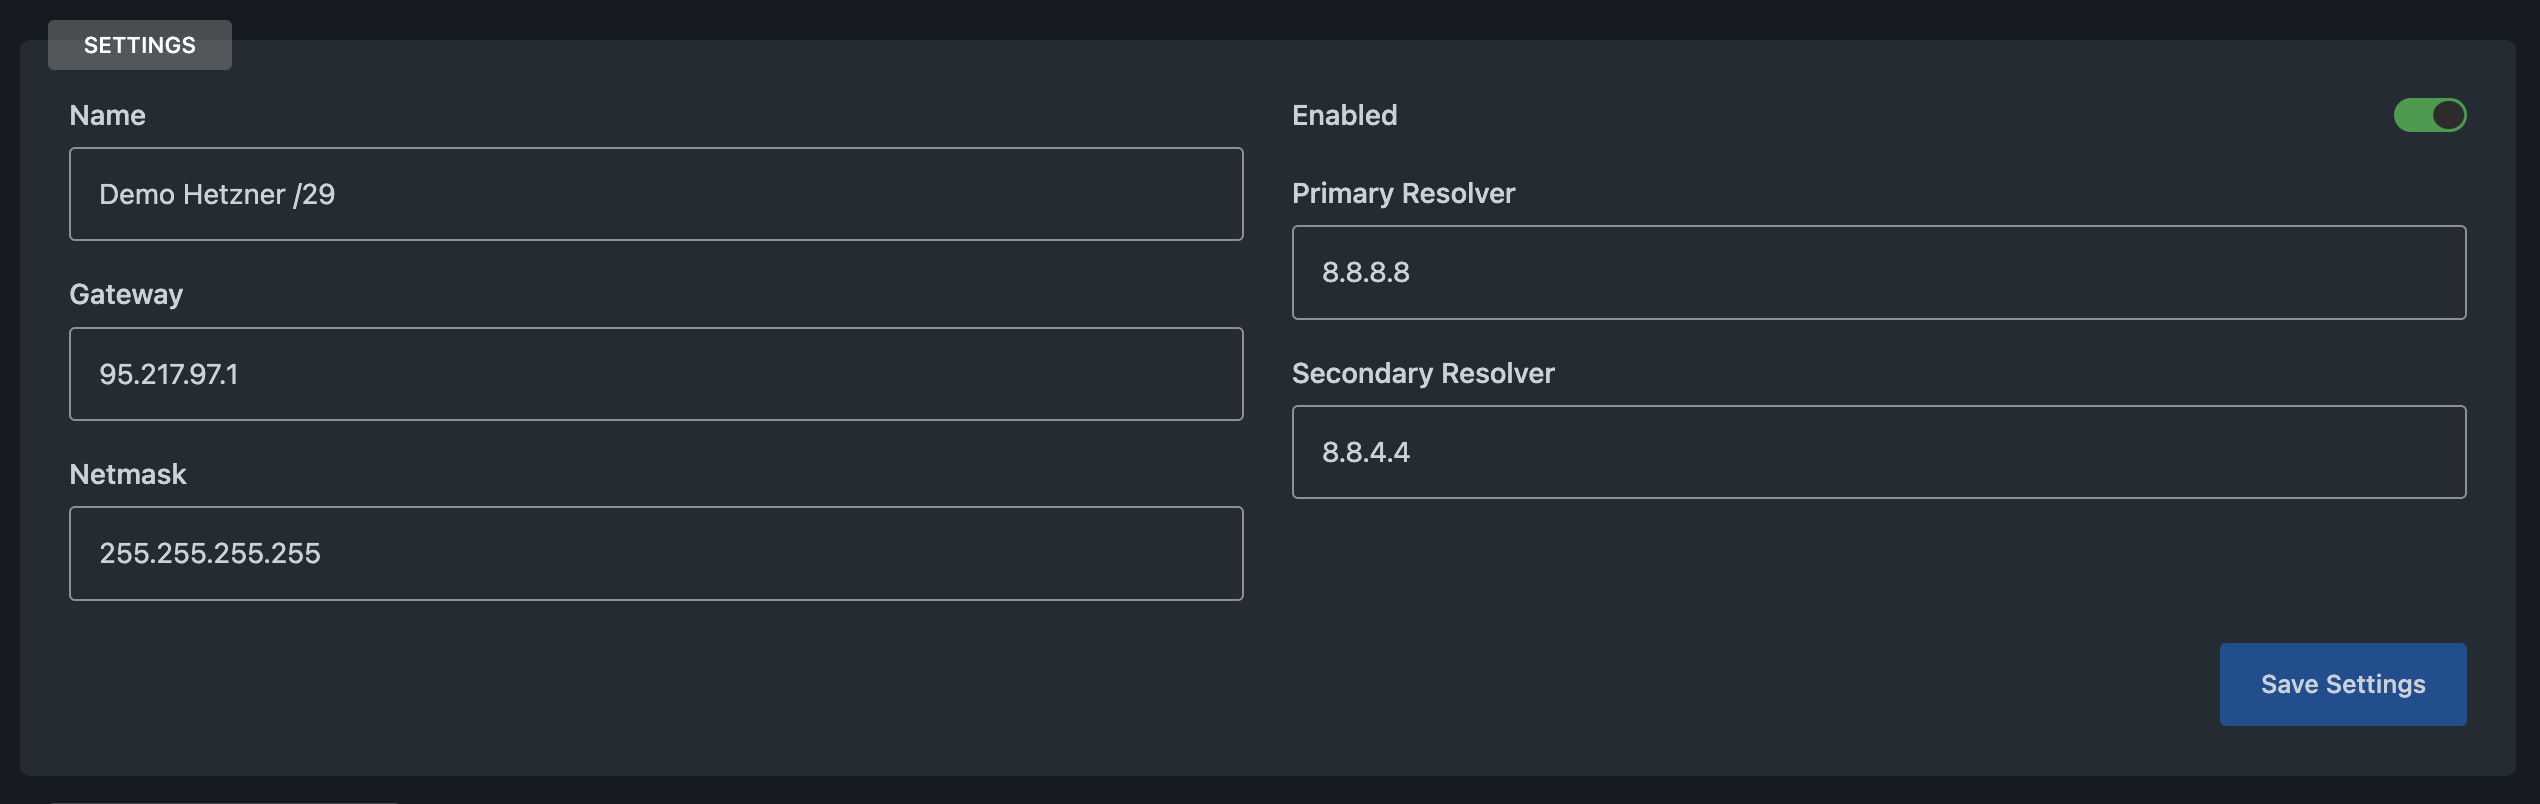
You may also use the hypervisor main IP address as the gateway, although some server operating systems don't play nice when the gateway is out of subnet range (looking at you, Windows).
Once you have saved the block settings, assign the block to the correct hypervisor and interface.
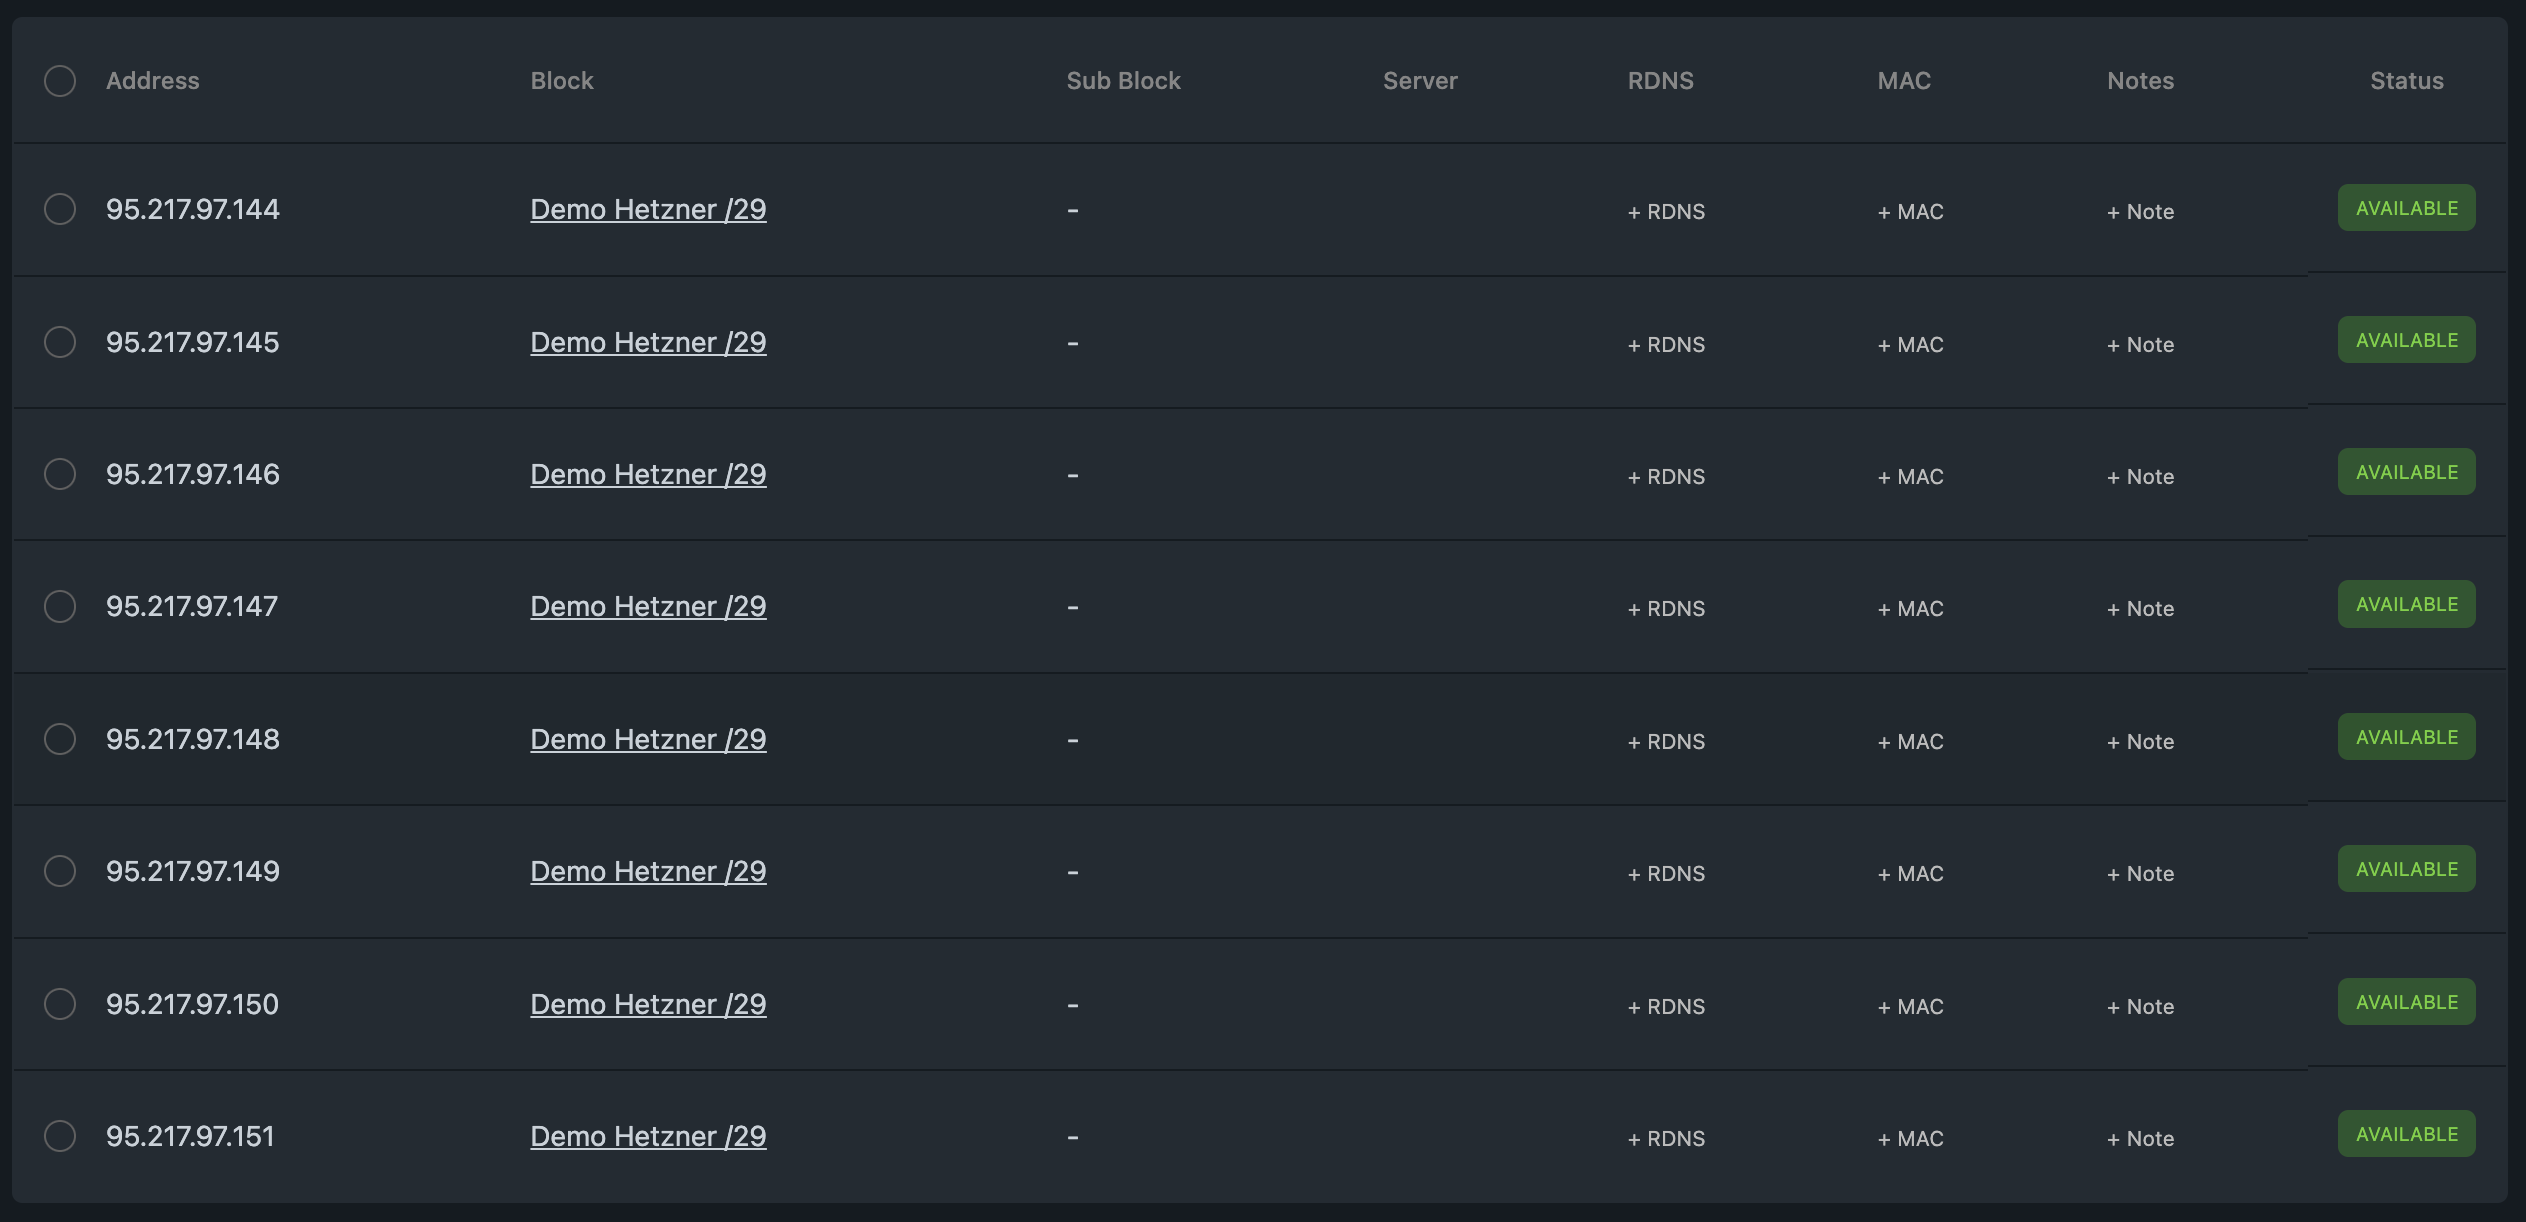
Then add your IPs.
That's it. You should now have a working configuration and are ready to build servers with your routed IPs.
Other Useful Information
Modifying the Hypervisor Network Configuration
At some point you may need to make changes to the network configuration. You can edit the live configuration using the following command.
virsh net-edit br0
You would then need to stop, then start the network after making the changes.
Running the following commands will disconnect all existing servers from the network. You will either need to reboot each server or restart the hypervisor, or re-link the interfaces using virsh.
virsh net-destroy br0
virsh net-start br0
Re-linking the virtual server interfaces
virsh list --name | xargs -i virsh domiflist {} | grep -w BRIDGE_NAME | awk '{print $1}' | xargs -i ip link set {} master BRIDGE_NAME
BRIDGE_NAMEshould be the name of your network.